Are you noticing that your bike chain rubs on your front derailleur? It may be time to check out your limit screws or to ease your cable tension. A chain ring rubbing against your outer cage plate can make gear shifting frustrating!
A rubbing front derailleur is easy to fix, and you may only need a quick barrel adjustment. Below, I’ll take you through how to eliminate annoying chain rub in a pinch.
Key Takeaways
- Chain rubbing on the front derailleur cage is not normal and can be fixed by adjusting the position, angle, height, and limit screws of the derailleur.
- The gap between the chain and the cage should be around 2mm on both sides, and the cage should be parallel to the chainring.
- The barrel adjuster can be used to fine-tune the cable tension and indexing, which affect the shifting speed and smoothness.
- Worn or damaged chainrings, teeth, cables, or cages can also cause chain rubbing or other problems, and may need to be replaced or lubricated.
- Electric front derailleurs may require software updates, battery charging, or professional assistance to fix chain rubbing issues.
Is Bike Chain Rubbing on a Front Derailleur Cage Normal?
Generally, your bike chain shouldn’t rub against your front derailleur during a ride or when shifting gears. However, some bike designs may pressure your frame flexes and chainrings to rub side by side.
It’s good to check your front derailleur cage setup before worrying about chain rub. Ideally, your front and rear derailleur should move your chain during a gear change without friction, making for a smoother ride.
Unfortunately, your front derailleur cage can fall victim to a few common problems. For example, it could be sitting at the wrong angle or running out of lubricant.
In my experience, I’ve reduced chain rub by adjusting my limit screw settings and adjusting how my front derailleur cage sits on my bike. In rare cases, I’ve checked my indexing and applied lubricant to the pivot.
If you’re feeling resistance trying to reach the highest gears, follow my checklist below. You may only need a quick twist of the barrel adjuster to get back to smooth shifting!

Tools You’ll Need To Fix Chain Rub
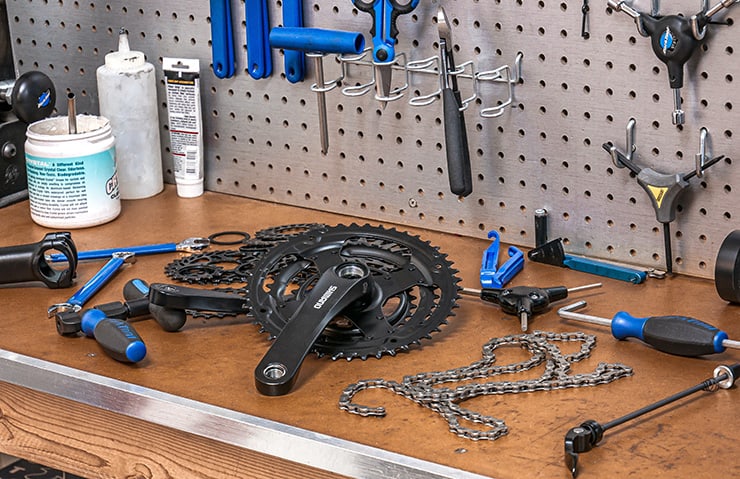
Fixing chain rub on a front derailleur probably won’t need too many tools, but be sure to grab:
- A screwdriver (for your H screw and L screw)
- Lubricant (for the pivot point of your front derailleur
Beyond extra tools, pay close attention to your bike’s barrel adjuster. This small, knob-like device helps to control cable tension across your bike. Barrel adjusters are great for tightening and loosening derailleurs. They may even help reduce front derailleur chain rub.
You’ll also need your barrel adjuster to fine-tune your brakes, so always adjust with caution! If you’re unsure how to adjust your specific bike, always refer to your manual, or speak directly with the manufacturer.
Front Derailleur Adjustment – Step by Step
Adjusting your front derailleur cage and chainrings is easier than it looks. You’re going to need to check:
- The position of your derailleur cage
- The tension of your gear cable
- Your high limit screw and low limit screw
Here’s how to get rid of that annoying rub.
1. Check Your Chainring and Derailleur Cage Alignment
Chain rub is common when your cage runs far too close to your rings. Ideally, your cage needs to be no more than 1-2mm higher than the ‘big ring’ at the front of your bike.
Your outer cage plate should also sit completely parallel to your chain ring. If not, you’ll need to carefully tighten or loosen your clamp bolt (or pinch bolt, if applicable), and adjust until it’s at the right angle.
The larger the gap between front derailleurs and chains, the more likely the latter will shift too much during use.
Always check the angle of rotation on your front derailleur cage, too. Inappropriate angling will cause shifting problems when you change gears during a ride.
If you have a derailleur clamp bolt holding your cage in place, you can release tension in your shifter cable and move your derailleur around.
Start by moving to the inner chain ring, and note where your clamp resides before making any changes.
You can change the rotation of your cage by loosening this bolt, then tightening back up when your cage is in the correct position. Shift back to the outer chain ring and check how everything looks.
Chain rubbing may even occur if your derailleur cage is bent or damaged.
What About the Height of Your Front Derailleur?
If your derailleur cage is too low compared to your chainrings, you’ll likely experience chain rub. A cage that’s too high will cause shifting problems, too.
You should ideally position the outer plate of your cage over the largest chainring. If not, carefully adjust the inner wire and position your plate over the chainring teeth. Relax your inner cable and adjust the height if needed.
You shouldn’t have a gap any bigger than 2mm between your chainring teeth and cage plate. If you need to adjust this, move to the innermost chain ring, loosen the clamp bolt (if you have one), and tighten it back up.
Please note! Not all bikes will allow you to adjust or rotate your cage and chainrings in this way. However, plate-mounted models may be easier to fix, as they arrive with preset cage positions.
If you’re unsure how properly adjusted bikes should look, check out any manuals you have for your model, or consult your manufacturer online.
Here’s a handy video tutorial to follow:
2. Check and Adjust Your Limit Screw Setup
Your front derailleur will have two limit screws – a high limit screw (or H-screw), and a low-limit screw (or L-screw). These decide how your derailleur cage moves during rides. You’ll find a similar setup on your rear derailleur.
Poor limit screw adjustment can cause chain loosening. Front derailleurs that move around wildly will cause chain rings to wobble. A restricted cage won’t move the chain at all.
Limit screws can also affect cable tension on your bike, but you’ll need to pay attention to your indexing, too. I’ll cover this in full detail below.
Your limit screws are at the top of your front derailleur cage. These aren’t always clearly marked, so check any manuals you may have for your bike model, or consult your manufacturer online if you’re unsure.
L-Screws
L-screws control your derailleur cage’s movement ‘into’ your bike during a ride. If your chains are rubbing, you may need to loosen up your L-screw to allow for a gap of around 2mm between the chain and bike (on the inner side).
Before adjusting any limit screws, always remember to do so incrementally. Chain rubbing caused by cage gaps will require fine-tuning – check the gap size with each twist of the screw.
Move onto your bike’s smallest chainring and the biggest cog available. Carefully loosen the L-screw counterclockwise, testing for rubbing by moving the pedals as you go. To tighten the gap, you’ll need to move the screw clockwise.
Check if the rubbing persists across all gears and the downshifting of your front derailleur. Is it shifting very slowly? Loosen the L-screw a little more.
H-Screws
H-screws work the opposite of L-screws – they stop front derailleur cages from moving too far away from your bike during a ride.
You’ll need to adjust your H-screw if your chainrings are too close to your cage’s outside edge. So, you’ll need to move onto the smallest cog at the rear and the largest chainring. It also helps to pull your cable tight before adjusting these screws.
There should be a slight gap between your cage and outer chain. As with the L-screw, turn the H-screw counterclockwise to loosen, and clockwise to tighten, little by little.
As above, test for rubbing across all gears and test the pedals. Keep adjusting the H-screw until the rubbing stops.
Of course, rubbing may still occur if your bike needs repairing, or if you need to adjust your shifting cable tension.

3. Check and Adjust Your Indexing and Cable Tension
If your bike has a barrel adjuster, you can increase and decrease the tension in your shifter cable. This is called indexing, and you can tell if your bike is applicable here if you can also see a shift lever with three ‘click’ marks.
It’s important to look into indexing and gear cable tension only after you’ve checked the limit screws. In my experience, it’s simply because they’re more likely to cause chain rubbing!
How Tight Should a Front Derailleur Cable Be?
Your front derailleur cable should carry some tension, though too much will cause the chain to rub on the inner cage. Too slack, and your chain will rub on the outer cage!
Using an inline barrel adjuster, you can loosen up your shifter cable by screwing it clockwise. To tighten up, you can adjust your chain slightly by turning it counterclockwise. If you unscrew your barrel completely, you can use a pinch bolt (if available) to move the cable further.
Index Adjusting on a Two-Chainring Bike
If your bike has two chainrings, move to the outer chain ring and rear cog. If the gap between the chain and your outer cage is clear, you won’t need to adjust it.
You’ll need to increase the tension in your inner wire if there’s rubbing. Move your barrel adjuster counterclockwise in slight amounts and check as you go.
You may need to reset your barrel completely or shift to a pinch bolt if rubbing continues once fully turned. Before adjusting the bolt, you’ll need to shift back to the innermost chainring.
Using a Pinch Bolt
If you need to use a pinch bolt to alter your cable tension, loosen it up and pull it tighter. Then, turn your bolt again to tighten it back up, and continue adjusting with your barrel.
You should then – as you did with your limit screws – check for rubbing and tension problems at each gear through pedal testing.
Index Adjusting on a Three-Chainring Bike
With a triple-chainring bike, shift over to the middle chainring, with the rear sprocket that’s innermost and towards the front.
Ideally, you should have a tiny gap between your plate and the chain. This needs to be as small as it can be before the chain rubs.
If the chain rubs, turn your barrel adjuster clockwise and check the available gap. Turn counterclockwise if the gap’s too large.
Again, if you move your barrel to its maximum turning point, you’ll need to reset its position and instead use the pinch bolt.

4. Check for Damage
In rare cases, chain rubbing on your front derailleur can occur if one or more elements are damaged or worn. For example, it may be that your chainring teeth are worn down.
Worn teeth can cause chains to rub and even stick during shifting and even during simple pedaling. You’ll know if you have worn teeth if they’re pointy – you’ll need to change the chain outright.
Your shifter cable can also rust and wear down over time. During derailleur adjustment, always check the quality of your cable housing. A bare cable is never healthy to ride with!
Some bikes may need new cables altogether, depending on setup. If you can’t lubricate your cable or fix fraying or rust, it’s efficient and cost-effective to just fit a new length altogether.
BONUS TIP: How To Fix Rubbing on an Electric Front Derailleur
If you’re lucky enough to have an electric front derailleur, you normally won’t have to make any of the above adjustments. Instead, check that the program or app you’re using to adjust with is fully updated.
Believe it or not, battery life can affect derailleur problems when running an electric system. Charge it up, check your cables, and if all else fails, speak to the bike shop you bought your system from (if applicable).
Other Common Problems You May Face With Your Front Derailleur
Front derailleurs can be tricky customers even when there’s no rub, so it’s good to know how to adjust them safely. Here are a few other common problems you may face while running a bike over time.
Cross-Chaining
Cross-chaining is easy to fall into – it’s a condition where you pedal on the smallest chainring and cog. It can occur on the largest cog and chainring, too.
This can create chain rubbing, and over time, it could cause serious stress and damage to your bike’s inner workings.
Dropped Chains
Chains that drop when you shift gears likely need adjusting at the L-screw and H-screw. Follow my advice above to ensure your rings are in place and that tension is appropriate.
Shifting Speeds
If your bike’s extremely slow to shift between gears, it’s possible that you need to adjust your front derailleur – even if there’s no rubbing. Shifting gears should be nice and smooth and shouldn’t require any requisite force.

Conclusion
I hope you found this guide to fixing chain rub helpful! Over the years, I’ve found adjusting the front derailleur on my bike gets easier and easier. Unfortunately, this adjustment is something you’re always going to need to practice if you want to keep your bike running smoothly.
Adjusting your front derailleur can make all the difference in how your chain moves. Even when you’re simply pedaling, a few tweaks can help to prevent rubbing, slippage and avoidable wear and tear.
Let me know if you have any tips or experiences that you’d like to share in the comments. Don’t forget to share this guide, too, if you have any fellow cyclists who could benefit from a little hands-on guidance!

