
For those new to Peloton cycling one of the first questions that comes to mind is how to change resistance on Peloton. As not all indoor exercise bikes are the same, it may be confusing trying to figure it out on your own.
By the end of this how-to guide, you will know three different ways to change resistance and a few essential tips on choosing the proper level.
Let’s get started.
Key Takeaways
- Peloton resistance refers to how heavy your wheel feels when pedaling, and it ranges from 1 to 100 on the screen.
- The original Peloton bike has a manual resistance knob that you can turn to adjust the resistance level.
- The Peloton bike plus has an auto-follow feature that can automatically adjust the resistance based on the instructor’s recommendations during on-demand classes.
- You can also adjust the resistance on the Peloton bike plus using the touch screen by enabling the developer mode and the in-class gestures options in the settings.
Peloton Resistance Explained
Peloton resistance refers to how heavy your wheel feels when pedaling. The higher the resistance, the harder you work.
The more you increase resistance, the harder it is to maintain your cadence level. (Cadence refers to the number of revolutions you pedal each minute.)
You will be able to see your resistance level on the Peloton screen. The levels span from 1-100, with one representing the least resistance and 100 the most.
Does Peloton Automatically Adjust Resistance?
Before I share a step-by-step guide to resistance adjustment, you may be wondering about auto resistance. Does the Peloton have automatic resistance control?
Since the bike has a mechanical resistance system, you must adjust it manually using the dial (or resistance knob, as it is called on the Peloton). The system uses magnetic resistance, meaning that the resistance system will work even if it’s not plugged in.
However, that doesn’t mean automatic resistance is out of the question. Some models will come with an auto-follow feature.
Only the Peloton bike plus can automatically control resistance. There is no auto-follow resistance feature on the original Peloton bike.
The auto resistance feature adjusts the levels based on the instructor’s recommendations during classes. The auto-follow feature does this by reading the target metrics of recorded and on-demand classes.
How To Adjust Resistance on Peloton
There are a few different ways to adjust the resistance on Peloton. The method you use may depend on the Peloton bike model you have.
This section will include a step-by-step guide for adjusting levels on the original Peloton bike and Peloton bike plus.
Adjusting Resistance on the Original Peloton Bike
If you have the original Peloton bike, adjusting your resistance levels will be simple.
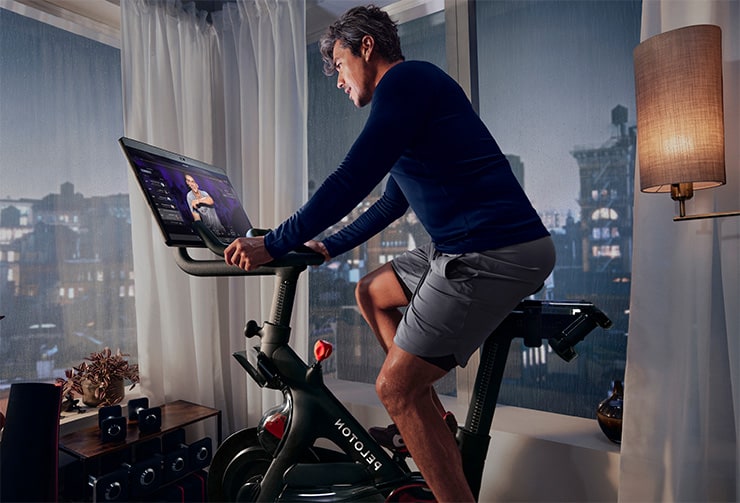
You will see a red knob on the bike frame; this is what you will need to turn to control resistance.
To increase resistance, turn the resistance knob to the right. To decrease resistance, turn it to the left. Every time you go for a ride and want to change the resistance settings, you will need to adjust it manually.
Adjusting Resistance on the Peloton Bike Plus
If you have the Peloton bike plus, you have two options: manual resistance adjustment or adjustment using the touch screen. If you don’t like one method, you can always try the other.
Keep on reading to find out how to do both.
Manual Adjustment
To manually adjust resistance on the bike plus, you use the peloton resistance knob, just like the original bike.
To increase resistance, turn it to the right; to decrease it, turn the knob to the left. Since the knob on the Peloton Bike plus is a bit easier to control compared to the original, you won’t need to stop your workout to adjust resistance levels.
Adjustment Using the Screen
You can also adjust resistance using the screen on your bike plus. This option is a bit more tricky than using the knob, so refer below for a step-by-step guide.
See Pelo Buddy in the youtube tutorial below, including the following steps. Be sure to check this out if you have trouble following the written instructions.
- Go to the settings tab and click on device settings. You can find the settings tab at the top right corner of the bike’s touch screen. In this section will be the device settings. When you click on this, you will find the system tab.
- Enable developer mode. Once you are in the systems tab, click ‘About,’ then click ‘Build Number.’ Once you tap this button seven times, you will get to the developer mode.
- Enable in-class gestures. Now that the developer mode is on return to the main screen. Click on the developer options and scroll through the options until you see ‘Peloton Gestures.’ Enable in-class gestures. Now, you should be able to control the resistance on the screen.
- Scroll up and down to increase and decrease resistance. All you have to do to adjust resistance levels is to scroll up and down on the screen, up to increase and down to decrease. Make sure to use two fingers when doing this.
What To Do if the Resistance Knob Is Too Tight
While many riders use the screen to adjust resistance levels, most riders take advantage of the resistance knob. However, if you find that turning the resistance knob is too difficult, it may be too tight.
If the resistance knob is not working, contact Peloton customer care. They will tell you what to do next or set up a bike replacement.
It may be an easy fix or a more serious mechanical issue. They may even send a customer service representative to take a look at your model.
When trying to fix the problem, only consult Peloton customer care; do not attempt to get external help, as this could void your warranty.
Comparing Manual Resistance With Auto-Resistance on the Peloton Bike Plus
While manual resistance is easy to use and allows for simple personalization, the auto-follow feature is super helpful as it will adjust the resistance on its own.
Compared to manual resistance, auto resistance will utilize metrics information to optimize your workout. When it comes to the former option, it is up to you to decide what level you want. For this reason, your workout may not be as effective.
Some Peloton auto resistance advantages are that you can focus more on your workout during on-demand classes and not have to worry about what level to set it to.
Changing the resistance may interrupt your workout, especially if you have the original Peloton bike.
The Peloton auto resistance feature will make all of the hard decisions for you, as it will simply adjust the levels based on what the instructor recommends.
How To Use Auto-Resistance
Enabling the auto-resistance feature only requires two easy steps. Refer below for a step-by-step guide.
If you want a few more tips regarding this feature, check out this video:
Step One: Choose an On-Demand Class
First of all, you need to choose the right class. Since this feature won’t work with live classes, you will need to choose an on-demand or recorded class.
Keep in mind that auto-follow won’t be available for brand new on-demand and recorded classes; sometimes, it takes a bit of time for the data to become available for auto-follow resistance to work.
Step Two: Enable Auto-Resistance in the Metrics Tab
Now you need to find the metrics section on your Peloton bike. In this tab will be the resistance option at the bottom right.
Click on the lock icon in the resistance option; now, the auto follow feature is enabled.
What Should I Set My Resistance Level To?
Now that you know how to adjust the resistance on your Peloton bike, you may be wondering what levels your resistance should be at.
There are a few factors to consider before answering this question. While some riders prefer a higher cadence, others prefer high resistance. It all depends on your goals and what levels you can maintain on the bike.
Choose a Level You Can Maintain
Since changing resistance levels can interfere with your workout, it’s best to choose a level you can maintain throughout most of the ride.
If you are a beginner, start with a lower resistance level, then slowly work your way up. Make sure you can maintain proper riding form at the levels you choose. If your form becomes sloppy, you may need to lower the resistance.
Think About Your Workout Goals
Cadence and resistance are two different things that work on different parts of your body.
If you want to focus on your cardiovascular and lung health, aim for a higher cadence, as this will boost your heart and breathing rate.
On the other hand, work towards a high resistance level if you want to build muscle in your lower body.
Learn From Your Instructors
Peloton cycle classes will always have knowledgeable instructors to help you along the way.
Often, you won’t have to try and figure out what level to be at, as your instructors will tell you what range you should be in.
In recorded or on-demand classes, you will see the resistance range goals on the screen. Live classes don’t have this, but the instructors will typically say what your goals should be throughout the class; just keep an ear out for it.
Final Thoughts on Changing Peloton Resistance
Did you enjoy this tutorial on how to change resistance on a Peloton bike?
Since there are a few different ways to change the resistance, it is good to know all three methods to choose the best option for you.
Any given range of resistance will affect your cadence and how challenging your ride is. Knowing the how-to of this problem is essential for a great and optimized cycling experience.
Be sure to comment and share the article if you liked it!