Let’s face it: your bike chain is one of the most neglected parts of a bike, but it is the device that keeps you moving. As your bike is a machine, the chain is essentially its engine. Your bike chain may need some tweaking if you notice that your riding has been “off” lately.
You may notice you feel wonky and off balance, especially when switching gears. This indicates that your chain is loose, and you need to tighten it. In this article, we will explain how to use the right tools to tighten your bike chain so that you’ll be riding smoothly again in no time.
Key Takeaways
- A bike chain is the device that keeps you moving and it needs to be tightened regularly for safety and smoothness.
- There are different types of bike chains, such as single-speed and derailleur, and they require different tools and methods to tighten them.
- To tighten a bike chain, you need to flip your bike upside down, loosen the axle nuts, pull the rear tire back, adjust the chain tension, and tighten the axle nuts again.
- You should check your chain tension monthly and replace your chain when it is old, rusty, or stretched out.
- Lubricating your chain frequently will prevent rust and debris from building up and extend its life span.
How does a Bike Chain Work?
Your bike chain is a masterful apparatus: it’s both durable and delicate, which means it’s extremely important to handle your chain with care and precision.
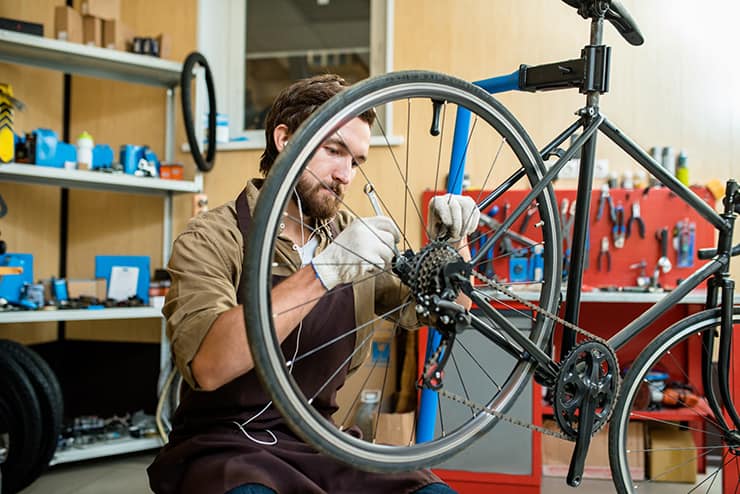
The bike chain loops around your bike’s sprockets. The sprockets are the grooves that your bike chain rests on. As you pedal, the chain links rub against the teeth of the sprockets, causing a rotation, which turns the bike’s crank, in turn rotating the wheels.
The derailleur is the part of your bike that moves the chain from one sprocket to another, all the while keeping it under tension. Without this tension, your chain can slip off the sprockets.
The rear derailleur is responsible for how you switch gears by moving your chain up or down the sprockets. Most bikes have this kind of gear, including mountain, road or gravel bikes.
Derailleur gears are equipped with a derailleur screw that prevents the derailleur from moving too far inward or outward. You can see the derailleur screw if you get up close, which stops the derailleur at each end.
Why Do You Need to Tighten Your Bike Chain?
The primary reason you need to replace or tighten your bike chain is for safety. A loose bike chain can easily fall off your bike, which can result in panic and you falling off your bike as well. In addition to preventing accidents, a healthy, new chain ensures smoothness in your ride which will make taking your bike out much more enjoyable.
When Do You Need to Tighten Your Bike Chain?
When you need to tighten your bike chain depends on how often you ride your bike. Frequent riders should check their chain tension monthly, and it may require tightening every 3-6 months. If you properly maintain your bicycle chain and tighten it when needed, your chain can last at least 3,000 miles.
What You Need to Tighten a Bike Chain
You will need the following tools:
- Socket wrench
- Bike stand (optional)
- Dry bike lubricant
- Rubber gloves (optional)
- Cloth/rag
- Derailleur (depending)
How to Tighten a Bike Chain on a Single-Speed Bike: Step-by-Step Instructions
Once you´ve gathered the right tools and are ready to tackle tightening your loose bike chain, follow these steps to tighten a sagging chain on a single-speed bike. Watch the video below for a visual aid. Put on those gloves and get to it!
1. Turn Your Bike Over
Flipping your bike upside down will allow you easier access to all the bike´s parts. Some bikers opt to use a bike stand to do so, as this provides stability during the procedure. However, you can do just fine without a bike stand.
2. Slacken the Rear Axle
After you situate your bike upside down, the next step is to remove the axle nuts that fasten the tire to the bike. To do so, you will need to get out your socket wrench. Get a grip of the axle nuts and rotate the wrench counter-clockwise (lefty loosey) to loosen them.
3. Pull Back on Rear Wheel or Tire
As you´ve slightly loosened the axle nuts, you will need to drag the rear tire back to allow chain access. You must do this step gradually and delicately so as not to damage the bike chain – this is very important! An aggressive pull on the back tire can result in your chain cracking. Pulling the tire back in a controlled and gradual movement will slowly increase the tension on the bike chain, reducing chain sag. As you do this, make sure your tire stays in the wishbone.
4. Conduct a Bike Chain Tension Check
After placing tension on your chain by pulling on the rear wheel, make sure there’s the right amount of bike chain tension. With the right chain tension, the chain should be able to wiggle about a half inch in both directions.
If your chain moves too far in one direction, past a half inch, this means there isn’t enough tension, and your bike chain is still too loose. You will need to repeat step number three and pull back even more on the rear tire very slowly and carefully.
If you´ve made it too tight, you will know because the pedals will not be able to turn.
5. Put the Rear Tire Back in Place
After achieving the correct chain tightness, you can rest assured the hard part is over! All you’ll need to do is put the rear wheel back in its original position. Ensure the tire is situated in the center of the wishbone. Then, take your wrench socket and tighten the axle nuts on both sides of the wheel.
6. Check Your Work
It’s imperative to check your bike to make sure everything is functioning properly before you take it for a ride. Tighten your chain one last time to ensure you have the proper chain tension. Next, spin your wheels to make sure they aren’t touching the bike chain or bike frame. If they aren’t – congrats! You’ve successfully tightened your chain!
If you’re still having trouble after the procedure, there is no shame in going to your local bike shop to get a hands-on lesson on how to tighten a bike chain. Observe – and you’ll know exactly how to proceed next time!

How to Tighten a Bike Chain on a Multi-Gear Bike: Step-by-Step Instructions
Multi-gear bikes have derailleur chains, which differ from single-gear bike chains because they move from sprocket to sprocket as you switch gears. Here are step-by-step instructions on how to tighten a bike chain with a derailleur.
1. Put the Bike in the Correct Position
Just like with a single-speed bike, you will need to place your bike upside down or use a bike stand to easily access the essential parts.
2. Find the Derailleur Screw
You can locate the derailleur screw on the back of the derailleur; it usually has the letter “B” engraved next to the screw. Twisting this screw clockwise (remember – righty tighty) will increase chain tension.
3. Access the Rear Tire
This next step requires taking apart some parts of your bike, so do so slowly. You will need to remove the brakes from the cable. Lifting the brake lever carefully will allow you to reach the rear tire.
4. Adjust the Rear Tire
Once you have accessed the rear tire, great job – you can now adjust it. Position the wheel axle so that the derailleur chain tension increases. This will allow your chain to remain tight. However, it should still be manageable and not too taut – as this will interrupt your ride.
5. Put Your Bike Back Together
Congrats – the hard part is over. The next step is to position all your bike’s parts back to how they were. You will then do some tests to ensure all of your parts are running smoothly.
You will need to reconnect your brakes and then tighten the screws. Spin your bike’s wheels. If they aren’t touching the chain or the frame, you’re good to go!
Frequently Asked Questions about How to tighten a Bike Chain
Why Do I Have a Loose Bike Chain?
There are many possibilities for why your bike chain has come loose. Don’t stress – a loose chain is a very common occurrence.
First, it’s likely that your bike chain is fairly new, but your bike has some years on it. New chains do not perfectly mesh with an old bike, as old bikes have worn down components warped from dirt, rust and other buildup. This causes your chain to bounce around and loosen. Tightening your loose chain will fix this issue.
However, old bike chains will also come loose, due to the usual wear and tear with any machine. When a loose bike chain is the result of old age, we recommend equipping your bike with a new bike chain.
Your chain can also become looser as the axle nuts become loose on the rear axle. This happens when the distance between pedals and the wheels shortens. This can be a sign of derailleur damage on multiple gear bikes. If you think this is an issue, check your derailleur for any bending or dents.
Should I Replace or Tighten my Bike Chain?
Whether you replace or tighten your bike chain can depend on the current condition and life span of your chain. If your chain is old and worn, you should purchase a new chain. Rust, dirt, and other buildup will warrant a new chain. A new chain is pricey, but worth it as it will extend the lifespan of your bike.
If your chain is relatively new, there is no need to replace it yet. Tightening your chain will do the trick, and it will be good as new.
How Tight Should My Bike Chain Be?
After properly adjusting your chain, you should be able to wiggle it about half an inch in both directions. If your chain is still too slack and is moving farther than half an inch, it may be because your chain has stretched out. Over time, the links can expand. If this happens, you may want to remove some of the chain links:
Can Lubricating my Bike Chain Influence the Chain Tension?
Lubricating your chain is a crucial part of bike maintenance. Just as doing chain tension checks and frequent chain tightenings will extend their life, so will lubrication.
If you don’t lubricate a dirty chain, rust and other debris will stick to it. This will cause it to slacken quickly and wear down faster. Lubricate your chain every 100-150 miles, or even once weekly if you are a frequent rider.
This will prolong your chain’s life, saving you lots of time and money. It will also reduce how often you need to tighten it!
Final Thoughts on How to Tighten a Bike chain
Using the above method will leave you with the knowledge on how to tighten a bike chain, saving you a trip to the bike shop! This is one of the most crucial components of bike maintenance, as your chain is really the glue holding your bike together and propelling you forward.
Have you used this method to tighten a bike chain? Any tips you want to share? We’d love to hear your thoughts, so share them in the comments section.

