
If you’re a biker, you may know exactly when your tires need a boost, but what about when your bike needs a new chain? The first signs of bike chain maintenance usually show up when you switch gears. The gear switch may feel choppy or uneven. If so, you may need to clean or replace your bike chain. All chains have a master link which allows you to remove the chain.
The master link is often one of the most neglected parts of a bike, but you can easily find it by flipping your bike over and getting up close and personal. Once you fix and reinstall the chain properly, you’ll be riding smoothly again in no time.
In this article, we’ll take a look at how to find the master link on a bike chain properly. We’ll also learn about the purpose of master links and the basic tools you might need to find such links and fix your chain.
Key Takeaways
- The master link is the part of the bike chain that connects both ends and allows you to remove and reattach the chain for maintenance.
- There are two types of master links: straight chainline compatible links and external derailleur compatible links, which differ based on the bike’s gears system and sprocket width.
- You can find the master link by flipping your bike over, rotating the chain, and looking for a link that is slightly wider and of a different metal finish than the other links.
- Remove the master link with pliers or a special tool, depending on whether it is a clip-style or a rivet-style link. You may need to replace the master link or some pins if they are damaged or worn out.
- Keeping your bike chain clean and well-lubricated is important for a smooth and safe ride. You should inspect your chain regularly and replace it if it shows signs of wear or damage.
What is the Purpose of the Master Link On a Bike Chain?
The master link (also called quick link, power link, master rivet, and quick release link) connects both ends of the bike chain, the series of connected metal links that fit into the bike sprockets. As your bike chain is continuously at work propelling you forward, proper care is crucial to ensure a smooth and safe ride.
It is easy to overlook bike chain maintenance, but the more you ride, the more dirt, road filth, and salt spray it will accumulate. This debris will erode your bike chain, causing it to slacken over time.
How does a Bike Chain Work?
Your bike chain is durable yet fragile at the same time. This makes it extremely important to be able to remove and reconnect it with ease, tact, and frequency.
The bike chain loops around your bike’s sprockets. When pedaling, the chain links chafe the teeth of the sprockets, causing a rotation, which turns the bike’s crank. The crank then turns the wheels.
The derailleur is the part of your bike that moves the chain from one sprocket to another, all the while keeping it under tension. Without this tension, it may slip off the sprockets.
The master link detaches and reattaches the bike chain when you need to clean it, replace missing links, or replace it.
There are Two Main Styles of Master Link
Your master link is technically considered a roller-chain accessory. It is composed of two outer plates, which look like the outer side of a chain (which is why it blends into your bike chain). We will break down the two kinds of master links, which differ based on the style of bike you have. Some links are reusable and some are not.
Straight Chainline Compatible Links
Straight chainline compatible links are the most classic type and have been around the longest. If your bike is single-speed, hub-geared, or has another drivetrain system likely with wide sprockets, it likely is equipped with this kind of link. Lucky for you, this kind of master link is generally considered reusable.
This type of link contains two pins connected to the same plate, with a second outer plate secured with a clip. This particular assembly is also considered a clip-style link and is generally easier to take apart and clip back together.
External Derailleur Compatible Links
This is the kind of link your bike has if it uses a rear derailleur gears system. This is a gears system containing multiple sprockets moving the chain from one sprocket to another to downshift or upshift gears.
The sprockets are closely spaced and the bike chain is more narrow in a rear derailleur system to ensure seamless gear shifting. Consequently, the master link will look different than a straight chainline link, but will still resemble your chain’s outer plates. External derailleur compatible links contain two plates with one pin protruding from each. Each plate also has a slot for the end of the other pin to slip into.
This assembly lends way to a very tight fit for your link. Each pin is secured by pulling the chain outwards on both sides, forcing the pin ends into their respective slots. The two plates become locked, and should stay very secure with proper tension upon your chain.
This is sometimes called a rivet-style master link. They are known to be more durable and secure with a tighter grip. It is preferred by professionals for this reason.
You can always take your bike to a professional bike shop if you need to purchase a new master link or need additional guidance in replacing your link or chain.
What Does the Master Link Look Like?
It is possible to buy replacement master links and replacement pins individually, so when looking at purchasing these you will want to make sure that the master link is compatible with your chain type and brand.
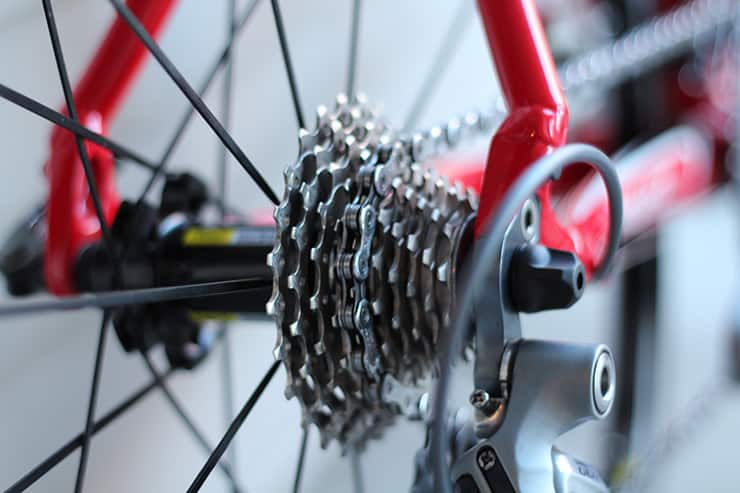
If you are dealing with a chain with a master link, you need to be able to find the master link within that chain. Look for a link that is slightly wider and of a different metal finish than the other links; your master link should not be too tricky to spot. However, you will need to make sure you spot it correctly if you wish to remove the master link. Follow the step-by-step guide below if this is the case!
How to Find the Master Link on a Bike Chain: A Step-by-step Guide
Here is a step by step guide on how to find the master link on a bike chain. You don’t need any special equipment to find the master link (although a bike workstand could be helpful), but you will need to have some basic knowledge of your bike type. For example, most bikes that are BMX bikes (bicycle motorbikes) or three speed town bikes with internal gears will have a master link, but not all bikes will have one.
While you don’t need a special tool to simply locate the master link, removing or replacing it will likely require master link pliers, needle nose pliers, and in some cases, a gear cable.
Most bike chains have a master link. You can usually tell if your bike has a master link if the width of the gap between the link plates is ⅛ inch or 3 mm wide. If you do intend to remove the master link and your link is rivet-style, you may need some tools such as master link pliers to pull apart the rivet from the chain. You may also need some special replacement pins if your chain comes undone incorrectly.
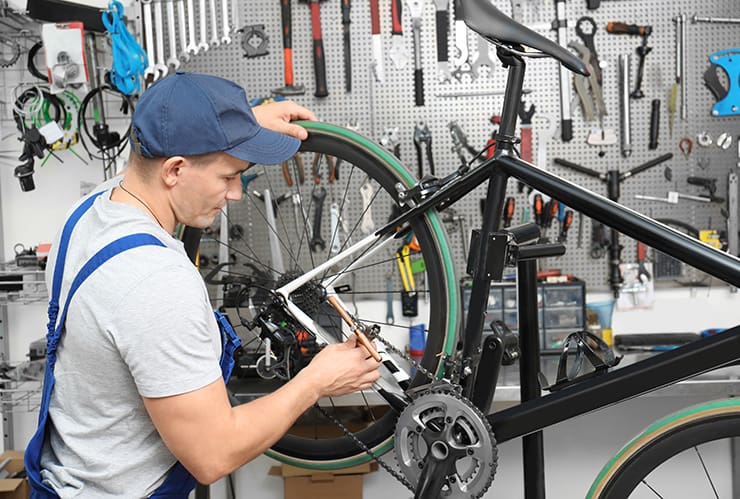
Step #1: Mount your Bike on a Bike Stand or Turn it Over
Turning your bike upside down will allow you easier access and a better view of the bicycle chain. If you don’t have a bike stand, rest your bike on the handlebars and place it on an even surface to ensure stability.
Step #2: Position yourself on the Drivetrain Side of the Bike
Next, you will need to position yourself for easy access. Move to the drivetrain side of the bike (where the pedals are, near the rear wheel and front gears).
Step #3: Move the Pedals Slowly
As you gently move the pedals, the chain will rotate, allowing you to inspect its links. Locate what is the largest, most unique link on the chain. This is the master link, your access into chain detachment and attachment.
Step #4: Unlock the Rivet and Remove Master Link
If you wish to slip off your bike chain for inspection or replacement, you will need to remove the master chain link. First, identify which kind of link your master link is – it could be a rivet style or clip style as mentioned above. Shift down to your lowest gear, turn off your clutch, and remove the chain. Check out the video below for visual instructions.
Missing Master Link: What’s Next?
If you find out that your bike has no master link and you need to take the chain apart, don’t sweat. you’ll just need a special chain tool (a chain breaker tool) to dismantle the chain links. In this case, it’s always a good idea to have spare links as well as an extra chain pin around.
- First, you will need to slip the chain off of its gear to release tension. This will prevent your bike’s chain from snapping.
- Line up the chain breaker tool with any link on the chain, making sure it is aligned with the rivet link pin.
- Turn the lever on the chain tool. A pin will pop out, and the chain link will come undone.
- Now, you can easily remove the chain for inspection, cleaning, resizing, or replacement. Check out the video below if you need additional help.
I hope using the above method will leave you prepared to find the master link and proceed with your bike maintenance. It’s important to get up close and personal with your bike so you can easily spot when a maintenance task is required.
The first time finding the link is the hardest, but the process becomes second nature in no time. Every bike is a machine, so regular upkeep is crucial! We hope you are now equipped with the knowledge to keep your bike chains smooth sailing.
We’d love to know your thoughts below. What worked, and what did we leave out? Don’t forget to like and share this article if you enjoyed these tips!
Thanks for this helpful information. Appreciate the author’s expertise