
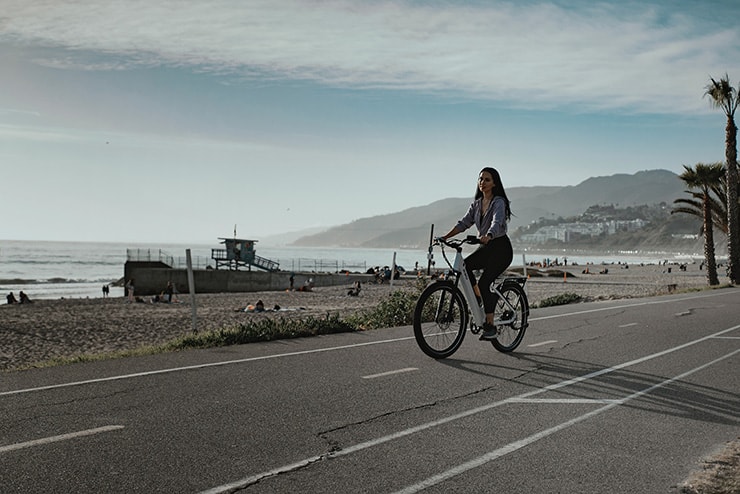
Electric bikes have been rising in popularity as they are great for touring, commuting, and long rides. However, since they have electrical components, you may be worried about protecting your bike from the elements, especially if your area is rainy or has humid air.
While some e-bike components are water resistant, others are not. This article will give you a step-by-step guide to waterproofing your bike. By the end of this article, you’ll know how to ride safely in wet conditions.
Key Takeaways
- You can ride your e-bike in the rain safely, but you might want to waterproof it to prevent water damage and rust.
- This involves using materials like silicone, grease, tape, and spray to protect your e-bike’s components from moisture and corrosion.
- You should check your e-bike’s IP rating to know how water-resistant it is and how much waterproofing you need to do.
Can You Ride Your Electrical Bike in the Rain?
You may be happy to hear that riding your electric bike in the rain is totally safe, as most e-bikes are water-resistant. Most electric parts that could be damaged are located inside the bike or have some sort of cover.
Are E-bikes Waterproof?
While e-bikes are largely water resistant, they are not waterproof, and it is still possible for the bike to experience water damage. Components like the e-bike motor or wires are susceptible to damage if you don’t take proper precautions. When it comes to e-bikes, avoid riding in a massive downpour!
What Are the Best Materials for Waterproofing Your Bike?
Before diving into waterproofing electric bikes, it’s a good idea to know the many different materials you can use for this process. In this section, I will explain the most commonly used materials, including silicone, grease, tape, and spray.
- Silicone. This material is mainly used for specific components you don’t often access since it creates a seal. Most cyclists use silicone to protect the controller’s screws and connectors.
- Grease. A common material that is used for waterproofing e-bikes is grease. This material is affordable and can be used on almost any bike component. It is relatively easy to use, so you can apply it yourself or hire a professional to help you. The main thing that grease does is block moisture and prevent rust.
- Tape. Many cyclists will use waterproofing tape to cover any exposed connectors or wires. Most tape is very reliable, affordable, and can last up to five years. Furthermore, you won’t need a professional to apply tape to your e-bike. The only downside is that you can’t use this tape on every part, as you would need to remove the tape to access some components.
- Spray. Another common material that cyclists use to waterproof their bikes is waterproofing spray. Not only will it help repel water, but it also reduces and prevents rust and corrosion, is non-conductive, and lubricates every part you apply it to. The main pro of waterproofing spray is that it is affordable and will last up to one year with one application.
What You Will Need to Follow This Tutorial

While there are multiple materials that you can use to waterproof your bike, you may want a short and simple list that is to the point. In this section, I will list all the materials you need to follow this step-by-step guide exactly.
However, remember that you can switch out certain materials (such as grease, tape, or spray) for others at your own discretion.
You also may choose to skip certain steps, such as installing headlights on your e-bike. Keep this in mind as you review the list.
- Rag
- Microfibre cloth
- Soap and water
- Headlights
- Taillights
- Bike fenders
- Dry bag
- Battery bag
- Anti-rust sealant spray
- Sandpaper
- Dielectric grease or petroleum jelly
- Liquid tape or nail polish
- Heat shrink electrical tape (optional)
- Drill
Waterproofing Your Bike: Step-by-step Guide
Waterproofing your electric bike can seem like an intimidating task. However, with this step-by-step guide, you’ll be riding in the rain in no time.
Remember that you don’t necessarily have to follow all of these steps. Use your discretion when reviewing the list, as each electric bike differs. Furthermore, you may live in an area that is not as humid or has less rain than others.
Step One: Clean and Dry Your Bike

The first thing you need to do is to clean and dry your electric bike. The reason for this is that most waterproofing materials will create an impermeable seal; if you don’t clean your e-bike, you may be sealing in dirt and debris.
Since most electric bikes are already water resistant, using water to clean the bike won’t be a big deal. However, avoid using anything strong such as pressure washers or hoses. The best way to clean your bike is with a wet rag and soap.
After washing your bike, you’ll also need to dry it thoroughly before waterproofing it to avoid sealing in leftover moisture. Failing to dry your bike fully may also lead to rust. The best way to dry your bike is to use a dry microfiber cloth.
Step Two: Determine Your Bikes Ip Rating
Before deciding how much you want to waterproof your bike, it is a good idea to first determine your e-bike’s IP rating, also known as the ingress protection rating system. An IP rating represents how well your e-bike resists dust and moisture.
All IP ratings are two digits, the first digit typically representing the ability to repel dust, while the second digit represents water-repellent ability. The higher the numbers, the better the resistance levels.
Looking up the IP rating of your electric bike will help you know the extent of waterproofing you’ll need to do.
Step Three: Install Lights and Bike Fenders
The third thing you’ll need to do is install bike fenders and lights. E-bike fenders will help in several ways. First, having fenders will protect your clothes from getting dirty as you ride. Most importantly, though, bike fenders will protect various components, like the battery, from getting wet or even damaged by debris.
Installing lights is more of a safety precaution than anything, but preparing your bike for low visibility conditions is essential. Installing headlights and taillights will help keep you safe when sharing the road with other vehicles during bad weather. Blinking lights are the best option for increasing visibility.
Step Four: Protect Gear With Waterproof Covers
Next, you should buy some waterproof covers to use during rainy weather or wet conditions. You should always bring a dry bag with you to store essential items like your phone, wallet, and any other things you need.
Furthermore, while e-bike batteries are water resistant, they are not waterproof. It’s important to protect your battery during a rainy ride. You can do this by purchasing a battery bag. To take it one step further, consider spraying the battery case with a waterproof spray.
You can also do this with your dry bag and any other covers you put on the bike. Some stores will also offer waterproof fabric bags, which is another good option.
Step Five: Waterproof Your Battery and Motor
As I previously mentioned, covering your e-bike battery with protective gear is important. However, if you want to take this one step further, I recommend waterproofing the battery and motor themselves.
You can use an electronics-safe spray for both the battery and the motor. Your best bet will be a sealant spray that has anti-rust properties.
Even if you have protective bags, coating your battery and other components with the spray will help prevent water droplets from seeping into cracks and causing damage.
Step Six: Clean and Coat the Connectors
For step five, the first thing you’ll need to do is to clean the connectors. While wiping down the connectors will be enough for some models, you may also need to use sandpaper to break down oxidization.
After cleaning the connectors, you’ll need to coat them with something to protect them from further corrosion, sealing them away from moisture and air. You can either use dielectric grease that you can buy from your local hardware store or use petroleum jelly.
Step Seven: Coat and Insulate Electrical Parts
Now that you have dealt with the connectors, it’s time to coat and insulate all the electrical parts. Water-resistant sealed components will significantly decrease the chances of water damage and keep your e-bike running smoothly.
If you want to go with the dirt-cheap option, pick up some clear nail polish, as you’ll be able to coat most electrical parts with this. Nail polish works because it is not conductive and is also waterproof.
When it comes to insulation, you can also use liquid tape. This can be found at any hardware store and is very affordable. You can apply liquid tape to most electrical parts as you would with nail polish, but unlike polish, the tape will remain flexible. Furthermore, liquid tape will also remain waterproof at a larger variety of temperatures.
One part you won’t want to miss waterproofing is the wires of the hall throttle. It’s easy for water to run down these wires. Since the wires enter the throttle, water damage is possible. Your best bet is to apply nail polish or liquid tape to the soldered ends of the wires. Some electric bike riders also opt for heat shrink wire insulation to protect the wires – so this is something you can look into as well.
Step Eight: Seal Internal Motor Parts
If you live in a particularly humid area, sealing the internal motor parts of your electric bike is critical.
Before you seal the internal parts, you may need to drill some small drain holes in the motor. Humid air may enter the internal parts through the cables as the hot motor cools. Once humidity increases inside the motor, rust can begin to form.
To avoid this, simply drill drain holes on the side plates to allow humid, hot air to escape. After this step, you can spray the entire motor with an insulating sealant.
Step Nine: Waterproof High-end Electrical Parts
Something that will top all the other tips is to get your electric bike potted. Potting refers to a professional service that helps waterproof your bike’s components. Certain components will be covered with a high-quality, waterproof sealant that eventually hardens.
The sealant that professionals use in the potting process not only protects your bike’s parts from shock damage if you fall or crash, but it also offers the highest level of waterproofing.
You may be wondering, if this is the best waterproofing solution, then why doesn’t everyone do this?
The main downside of potting electrical parts is that it is very difficult to do any sort of repair work on components that have been potted. For this reason, most electric bike experts suggest only potting high-end electrical parts.
Before you pot certain components, ensure they are reliable parts that will last a long time without repairing them. Try to only purchase high-end parts from trust-worthy companies.
Some Quick Tips for Riding an e-Bike in The Rain
Even though you’ve waterproofed your e-bike, you still need to keep in mind that riding in wet conditions is not the same as riding when conditions are fair. There are a few key protocols you should adhere to when riding an e-Bike in the rain.
- Take it steady. Avoid riding too fast, brake early (and take corners smoothly), and above all – know your limits! Even experienced cyclists need to temper their performance in the rain – and when you’re riding a (potentially) expensive electric bike, having a minor accident could be quite costly – to both the cyclist and the e-bike.
- Plan your route beforehand. Most electric bike riders enjoy riding for pleasure, but also necessity (many electric bikes are fast and reliable enough for commuting). But if you’re taking an unfamiliar route, be sure to plan it beforehand, and take a look at where you can take shelter if the rain gets too much to handle.
- Bring a troubleshooting kit. When riding in the rain, you’re at greater risk of suffering a malfunction with your electric bike (despite any waterproofing efforts), so having some tools, zip ties, electrical tape, a repair kit and other useful items on-hand could come in extremely handy!
Final Thoughts
Did you enjoy this article? While waterproofing your e-bike may seem intimidating, I hope you were able to get some good tips from this step-by-step guide.
Even if you don’t live in a humid area, this list is still essential, as a simple rainstorm may be all it takes to cause water damage. If you want your e-bike to last for years, be sure to save this guide.
Make sure to share this article with any of your friends who own e-bikes, and leave a comment on how the waterproofing process goes!